5 Exciting DIY Minecraft Craft Ideas · Craftwhack
Minecraft has remained a phenomenally popular and universally-loved computer game for years now, and so many kids admittedly love it.
Any arts and crafts ideas revolving around this will go down a storm, and so whether you lot're planning a Minecraft-themed party or just looking for rainy day activities, we've got some great Minecraft crafts ideas for you to do with your kids.
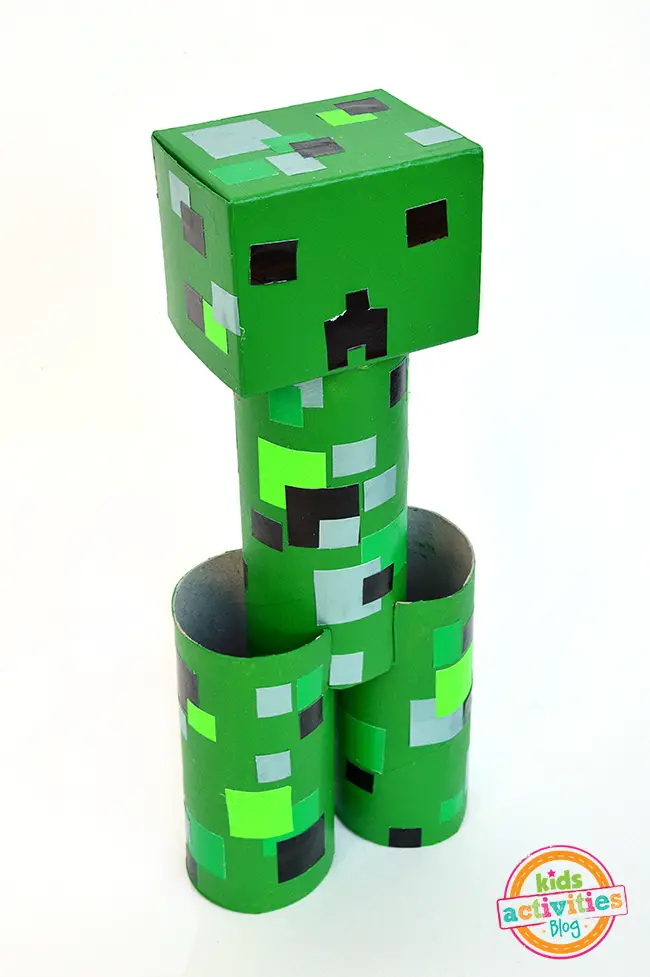
Toilet Tube Minecraft Creeper
 Source: https://kidsactivitiesblog.com/59931/toilet-roll-minecraft-creeper
The Creepers are iconic and immediately recognizable characters from Minecraft, and kids volition thoroughly savour making this trivial guy stand on their desks or guard their bedside tables – or sneak upon them in the middle of the dark.
Materials
To make a Minecraft Creeper, you need:
- 1 small paper-thin box (for the head)
- three empty toilet roll tubes
- Scrap paper in blackness, pale blue, bright greenish (or similar colors; this is to create the Creeper's "patchy" wait)
- Green paint
- Paintbrush
- Scissors
- Mucilage
Step one: Cut Your Toilet Rolls
You lot need to exist able to stand your Creeper's body on his legs, so you're going to cutting two slits in the meridian of your 2 "leg" toilet rolls, and then iv in the bottom of the body toilet curl. Slot the Creeper'south torso onto the legs, then add together some glue to concord it in place.
Step 2: Add The Caput
Have your pocket-sized paper-thin box and glue it close, so glue it to the pinnacle of the Creeper'due south trunk. You may find it's faster to apply a glue gun for this, rather than white mucilage.
Footstep iii: Paint The Creeper Green
It'due south time to permit your child get involved! The Creeper wants to exist dark light-green all over, and so dish out some greenish paint and let your child pigment him. Information technology doesn't matter nigh the insides of the toilet tubes as they won't really show when you lot're finished.
Stride 4: Cutting Up Some Squares
While the paint dries, help your child cutting out some little squares from the colored newspaper. These should exist fairly smashing equally Minecraft is a very blocky game, so you lot want to reflect that pixelated look. You lot can use any fleck paper for this, and information technology doesn't matter if the colors are perfect; you only want the Creeper to await patchy.
Step 5: Mucilage The Squares On
Check that the pigment is fully dry out, and so cascade out some glue and assist your kid stick the little squares in random points over the Creeper's body and legs. You lot tin can overlap squares with each other, build upwards small areas – only become for a random assortment of colors to liven up the green base.
Remember, lots of the green paint should still prove through when you've finished.
Step 6: Cut Out A Confront
Get a pic of a Creeper on your telephone and check what the face should await similar, and then draw a template onto your black newspaper and cut it out. Help your kid arrange the template on the Creeper's head, and stick it down.
You've at present got a fantastic Minecraft Creeper fabricated from scraps and glue, and your kid will love it!
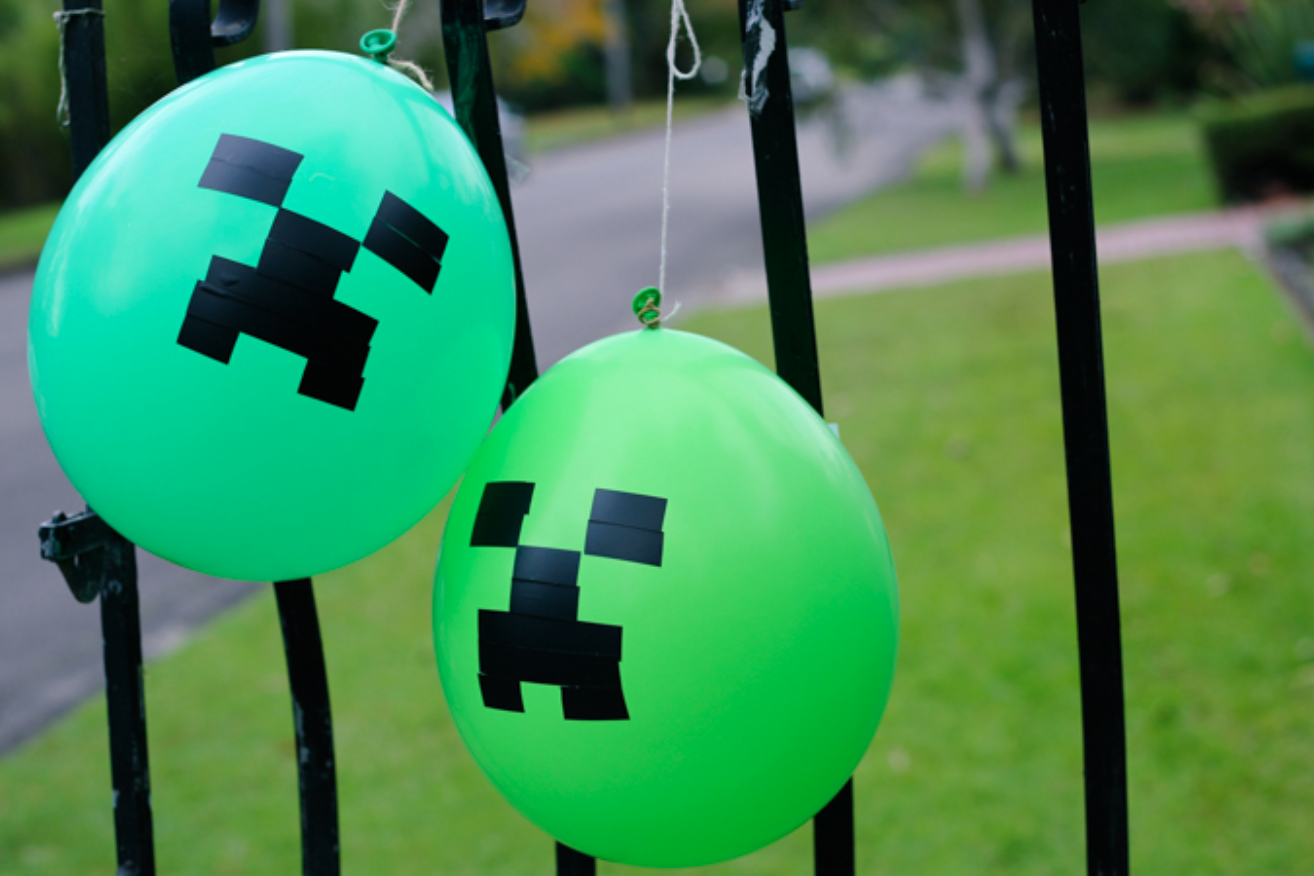
Creeper Balloons
 Source: http://world wide web.maxabellaloves.com.au/2014/05/the-best-diy-minecraft-party-decorations-especially-on-a-upkeep.html
If you lot're doing a Minecraft party, Creeper balloons will look admittedly fantastic. Y'all can even practice other Minecraft characters if you like, just the Creepers are particularly iconic. This arts and crafts is extremely piece of cake and should take just a few minutes – perfect for final party prep.
Materials
For this project, you're going to need:
- Green balloons
- Blackness paper
- Gum
- Pair of scissors
Step 1: Accident Upwards Your Balloons
Inflate your balloons so that they are squeamish and tight, and tie the knots firmly. You lot don't want your Creepers deflating too fast!
Footstep ii: Cut Out And Stick On The Face
Use a template from the net or simply draw Creeper eyes and a mouth onto some blackness newspaper. Glue this to the airship, beingness careful not to put too much pressure on the balloon in case it bursts. You're done! What could be easier than that?
These also brand great party favors for little guests to take home for their ain slice of Minecraft.
You can too make the other characters' faces; ghasts are particularly like shooting fish in a barrel, every bit you just need a white balloon with three black rectangles – 2 for eyes and one for the mouth. Y'all could also gum some tissue newspaper dangling downwardly to reverberate their tentacles.
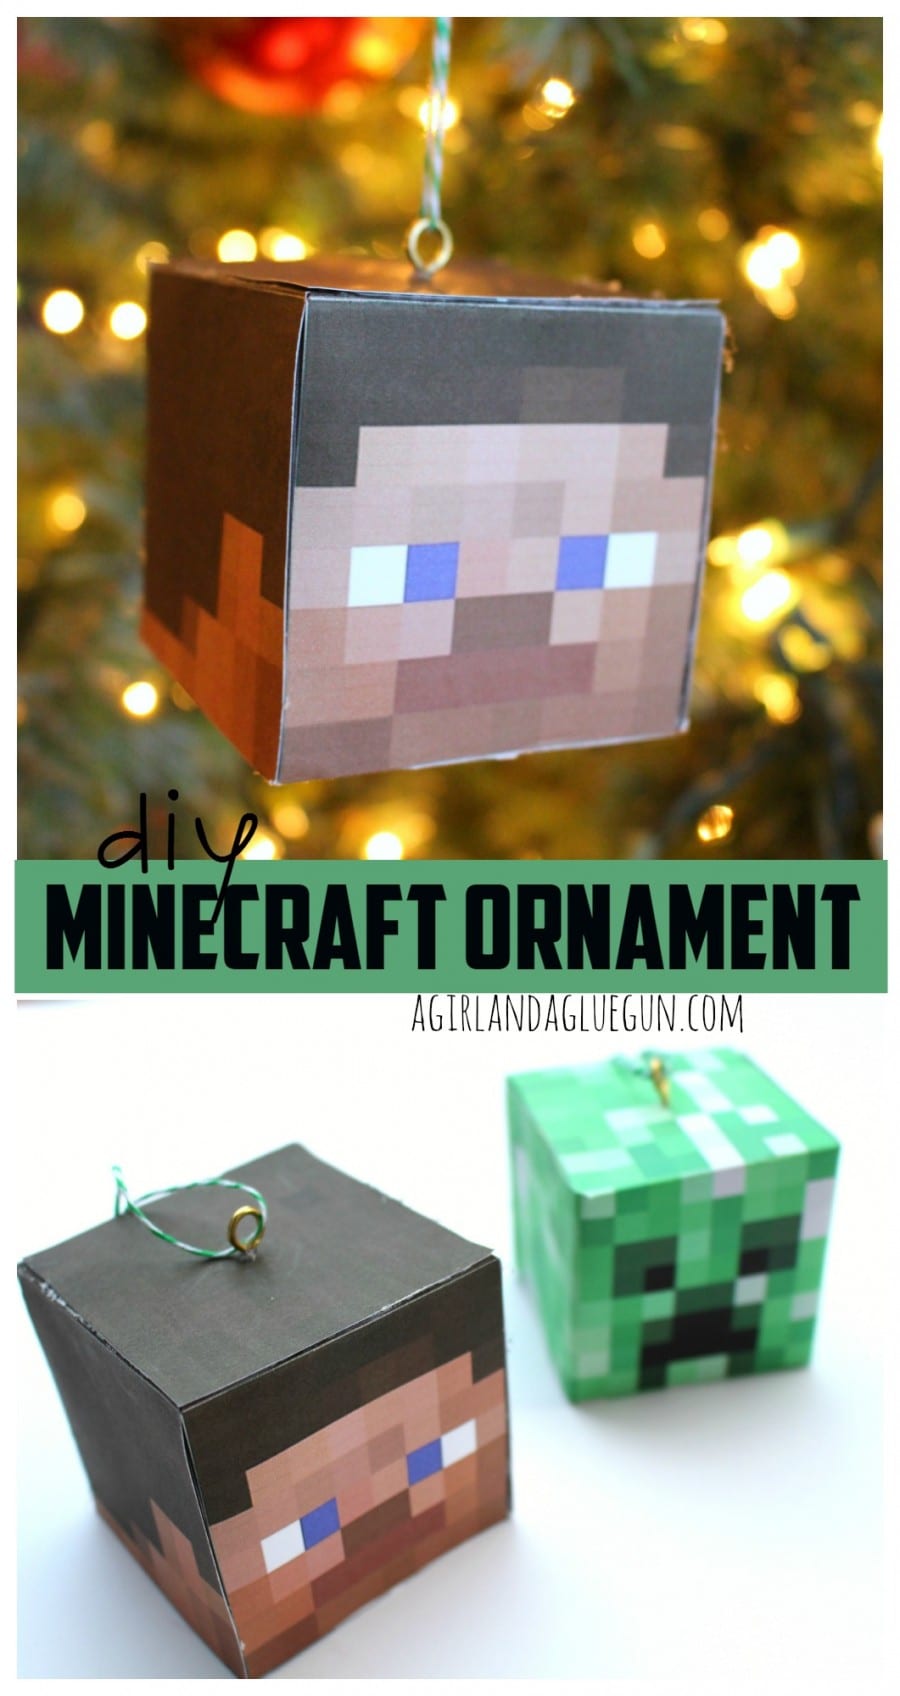
Minecraft Caput Ornamentation
 Source: https://world wide web.agirlandagluegun.com/2014/12/diy-minecraft-ornament.html
If you want a unique decoration for the Christmas tree or your child is afterwards extra decoration for their bedroom, a Minecraft character'due south caput tin can look astonishing. Because they are so square, they're piece of cake to recreate, and y'all can even print some of the things yous need from the internet.
Materials
For this project, you're going to need:
- A Styrofoam cake (or other square filling such equally a small-scale cardboard box)
- Printout of each angle of the graphic symbol's head from online
- Pocket-size eye claw
- Thread
- Mucilage
- Scissors
Step ane: Print Out The Face
You demand to start by printing out the face of your Minecraft graphic symbol. Enquire your child which 1 they desire (or make several if you have the time/materials). Once you've settled on a graphic symbol, find the different angles of their caput from the internet and print them out to the aforementioned size as your inner block.
Pace 2: Mucilage The Face up On
Assist your kid glue the printouts to the Styrofoam, being conscientious not to get mucilage on the printed side of the character – but the underside. Hot glue will work best for this job, simply yous'll want a thin layer then it doesn't make the ornament lumpy.
Step 3: Add The Hook
At the top of the character's caput, carefully twist the claw through the paper and into the Styrofoam. You may find it easier to make a hole with a pin showtime. You can also just add a dot of glue and stick the claw to the top if you're having trouble.
If you don't have a claw, you can do this with some cotton wool or wire, but it might be a little trickier to go far stick and information technology may not concluding quite besides.
Stride 4: Thread The Claw And Hang It Up
Once your claw has stale in place, thread your string through the top and tie information technology off. You've now got a wonderful Minecraft ornament to hang upwardly wherever you like!
Tip: if you don't have printouts available, you tin can make a Creeper'south ornament caput easily enough using the method we used for the toilet roll Creeper. Pigment your cube green and add patchy squares of other colors, and and so stick a face to the front.
Creeper Sock Puppet
If your kid loves sock puppets, a Creeper sock boob is a fantastic craft to practice with them. Y'all can make this very unproblematic and like shooting fish in a barrel, and they'll still have lots of fun with it!
Materials
To create a sock puppet, you'll need:
- An former dark-green sock
- Material scraps
- Black fabric
- Thread
- Needle
- Pins
- Glue
- Scissors
Step 1: Cut Out The Face up
Y'all'll need to cut the Creeper'due south distinctive mouth and eyes out of your blackness cloth. These are going to be sewn to the front of the Creeper's face up using black thread.
If you prefer, you can assist your child to glue the face (and other components) on, but using glue instead of thread will brand the Creeper puppet a trivial strong in one case the mucilage has dried, which tin be annoying.
Step 2: Cut Out The Squares
Help your child cut some squares from various dissimilar fabrics. You might find it fun to choose different textures also as different colors, or you tin just stick to whatever bits and pieces are in the sewing box.
Your colors can vary a fleck, just a Creeper should exist done in browns, greens, blues, yellows, and sandy colors – you don't want ruddy or purple on it. Essentially, it'southward in cover-up.
Step 3: Sew The Squares On
Side by side, get your child to help you determine where the squares should go. Retrieve that they can overlap each other and cluster upwards randomly. Pin them in place, and then sew them. Try to go them level with each other, rather than at different angles; this will make the puppet look improve.
You've now got a fantastic sock puppet set to creep up on unsuspecting players and attack!
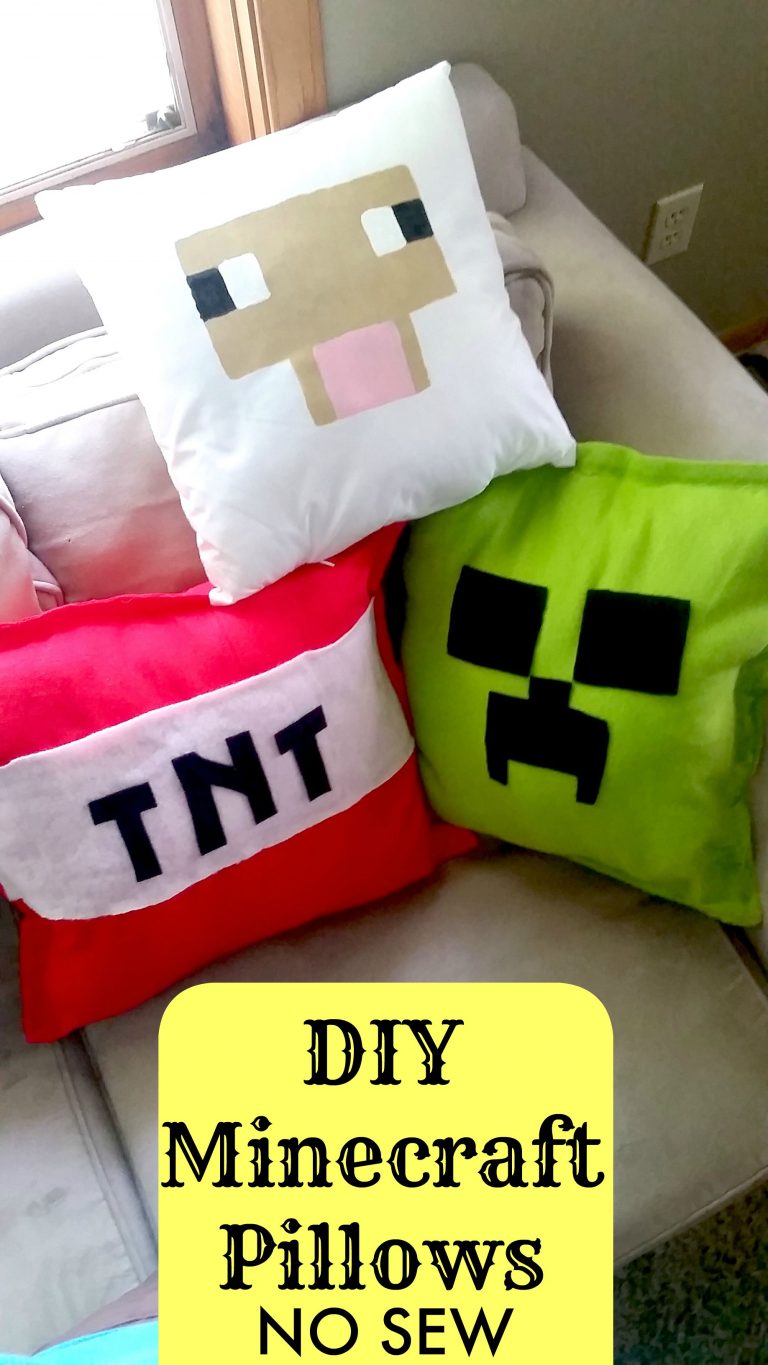
Minecraft Sheep Absorber
 Source: https://world wide web.survivingateacherssalary.com/diy-minecraft-pillows-no-sew-tutorial/
How about a sheep absorber? The sheep in Minecraft are endless fun, and your child will dear having their very own sheep to cuddle up with at night. These cushions are very easy and you can create a whole pile for your home if you want to.
Materials
To make a Minecraft sheep absorber, yous'll need:
- Plain white cushion comprehend
- Stuffing (or a cushion to fit)
- Biscuit, white, black, and pink acrylic paint
- A paintbrush
- Masking tape
- Foursquare of flake cardboard
Step 1: "T" Shape
The sheep'south face is going to be done in biscuit paint, and you should get-go past marking an outline on your absorber cover using masking tape. This is going to give you nice, professional edges.
Kickoff, prepare your cushion cover (unstuffed) on a apartment surface. Mark out a broad, horizontal rectangle most the peak of the cushion for the peak part of the sheep's face. Leave a gap of several inches at the bottom of this rectangle.
Side by side, mark a square, the lower function of the T, below this rectangle, joining your tape up to the gaps you left. You should now have a guide to paint within. The horizontal part of the T (where the eyes will go) should be longer than the vertical part (where the oral cavity will go).
Sideslip some fleck cardboard inside your absorber embrace to make sure the pigment doesn't get through and stain the other side.
Step ii: Paint The Face
Using the beige paint, paint within the masking tape. Your child can help with this if they want to; just be conscientious to stay within the taped lines. Once you accept filled the whole face, ready the cushion cover aside to dry.
Step 3: Add The Optics And Rima oris
Now, you're going to paint in the rima oris and the eyes. Become some pink pigment for the mouth, and paint a square at the bottom of the sheep's face. This should touch on the edge of your masking tape, covering up the beige paint underneath, so the mouth looks open.
Side by side, the eyes. Yous will demand a white rectangle and a black rectangle on either side of the face up, right at the edges. Y'all can add more masking tape to guide y'all, or just do this by hand; it doesn't need to be perfect.
Start with the black rectangle on the right-hand side. This would be well-nigh midway up your T'south cross and should touch on the edge. Do the same on the other side, and then allow it dry out a little and bandy to your white pigment.
Paint a white rectangle of the same size right side by side to your black rectangle. Your sheep's eyes are consummate!
Step 4: Add A Proper name (Optional)
Yous can pigment your child'due south name or a proper name for the sheep at the bottom of the cushion if you want to. This is not necessary only adds a lovely personal touch to it, and you can take great fun choosing a proper name for the sheep.
Step v: Stuff The Absorber
Once the pigment is totally dry, you should remove the cardboard, stuff the cushion (or add its insert) and zip it closed. You now have a fantastic Minecraft sheep cushion for your kid to snuggle up to at night.
Conclusion
Minecraft crafts are some of the best and near exciting things you lot can practise with a kid who'southward a footling chip Minecraft-obsessed, and they tin be a great way to encourage your kid to get off their screen for a little while without having to take abroad their favorite affair altogether.
Tell your child they tin can make some Minecraft crafts to give to their friends, or merely aid them come upwardly with a few themed pieces to decorate their bedroom with; they will love it!
Source: https://craftwhack.com/minecraft-craft-ideas/
0 Response to "5 Exciting DIY Minecraft Craft Ideas · Craftwhack"
Post a Comment